
Photos by L.G. Patterson
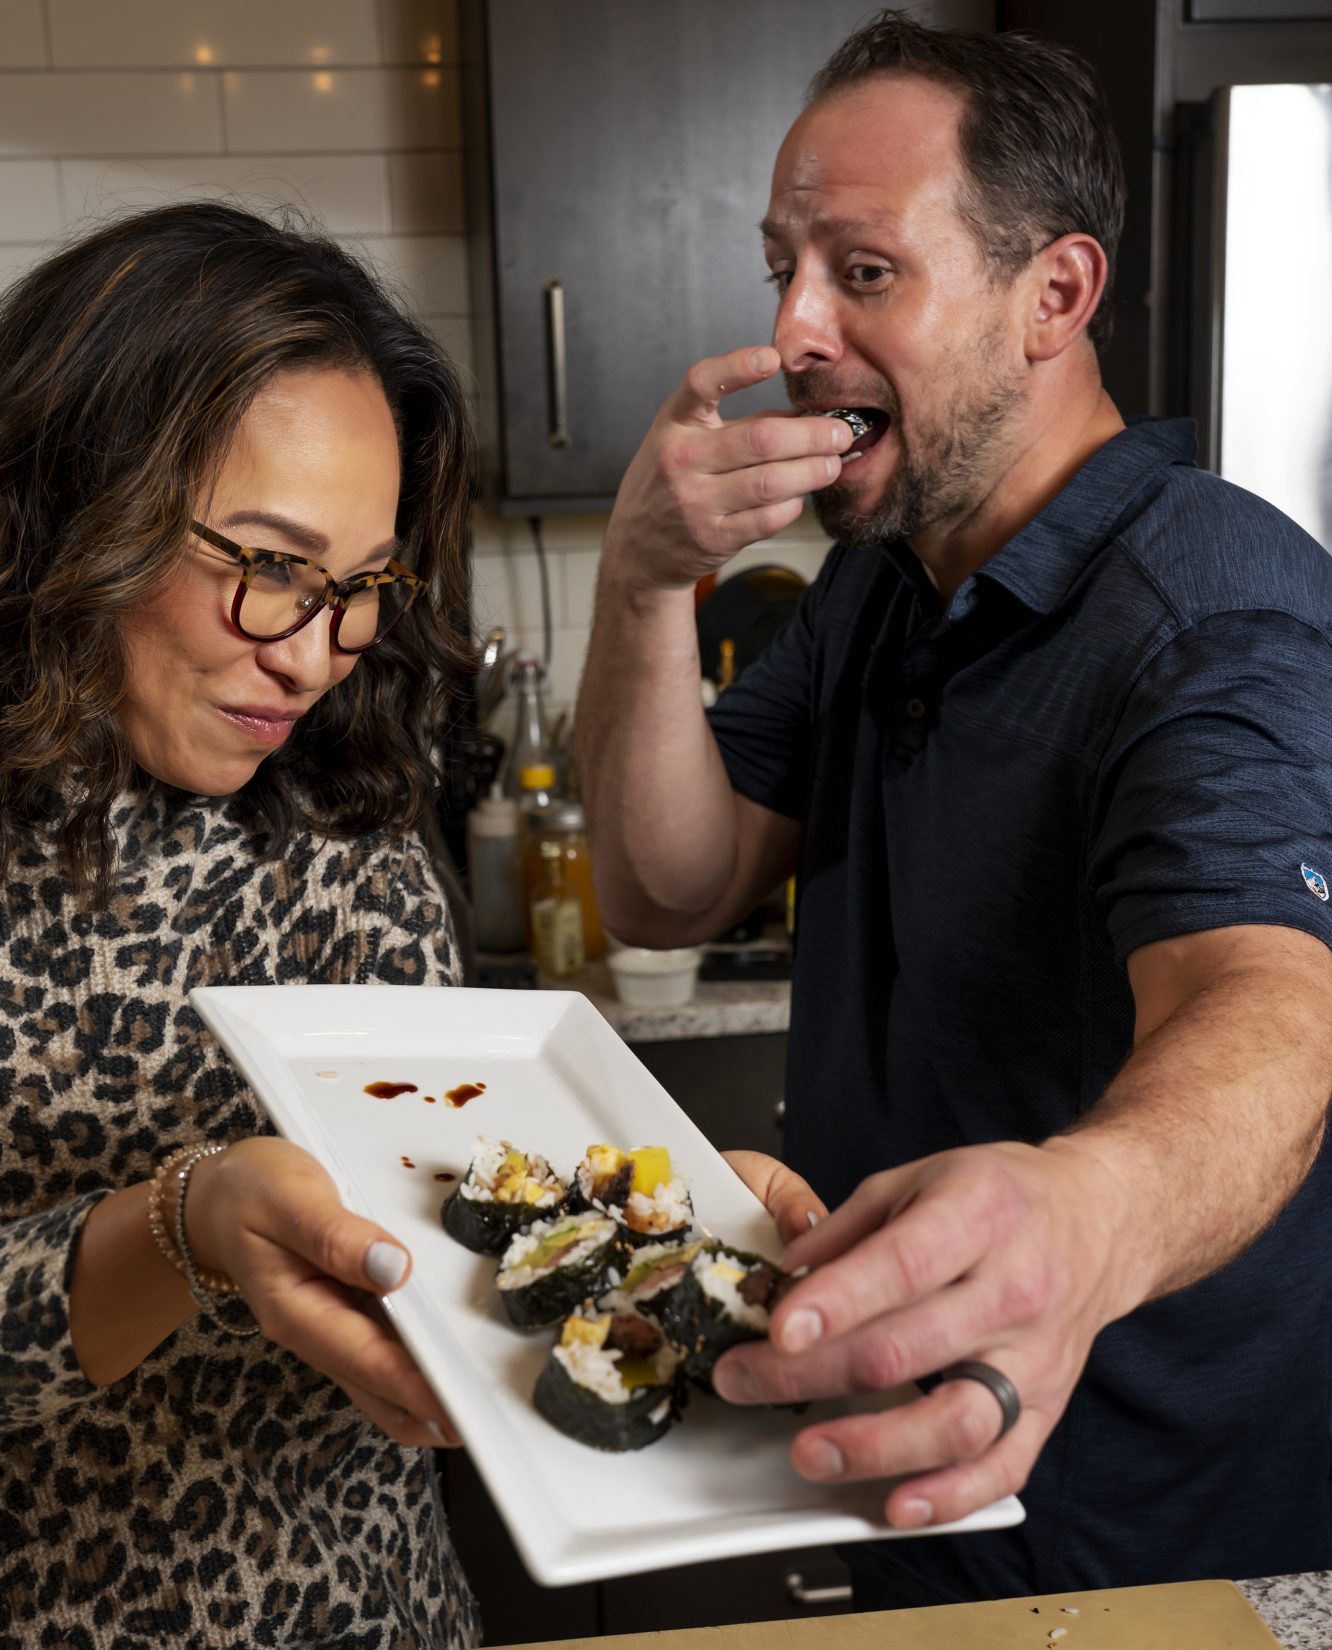
I recently had the pleasure of cooking with Jina Yoo.
If you have been around Columbia and are a lover of sushi, you have probably been to her namesake restaurant, Jina Yoo’s Asian Bistro, or her second Columbia restaurant, Le Bao Asian Eatery, featuring steam buns and ramen. Maybe you’ve tried her delicious sushi at the Lake, where she runs the sushi menu at Backwater Jack’s.
In our recent cooking excursion, we focused on two types of food close to Jina’s heart: sushi and bibimbap.
SUSHI
Many people are familiar with sushi, but have the mindset that it must always be served with fish.
While Jina has many types of sushi with fish on her menu, she points out that sushi is vinegared rice served along with other ingredients. You can use anything to make maki (rolls) or nigiri (formed rice topped with a component) or use nori (seaweed paper) to stuff with the rice and other ingredients.
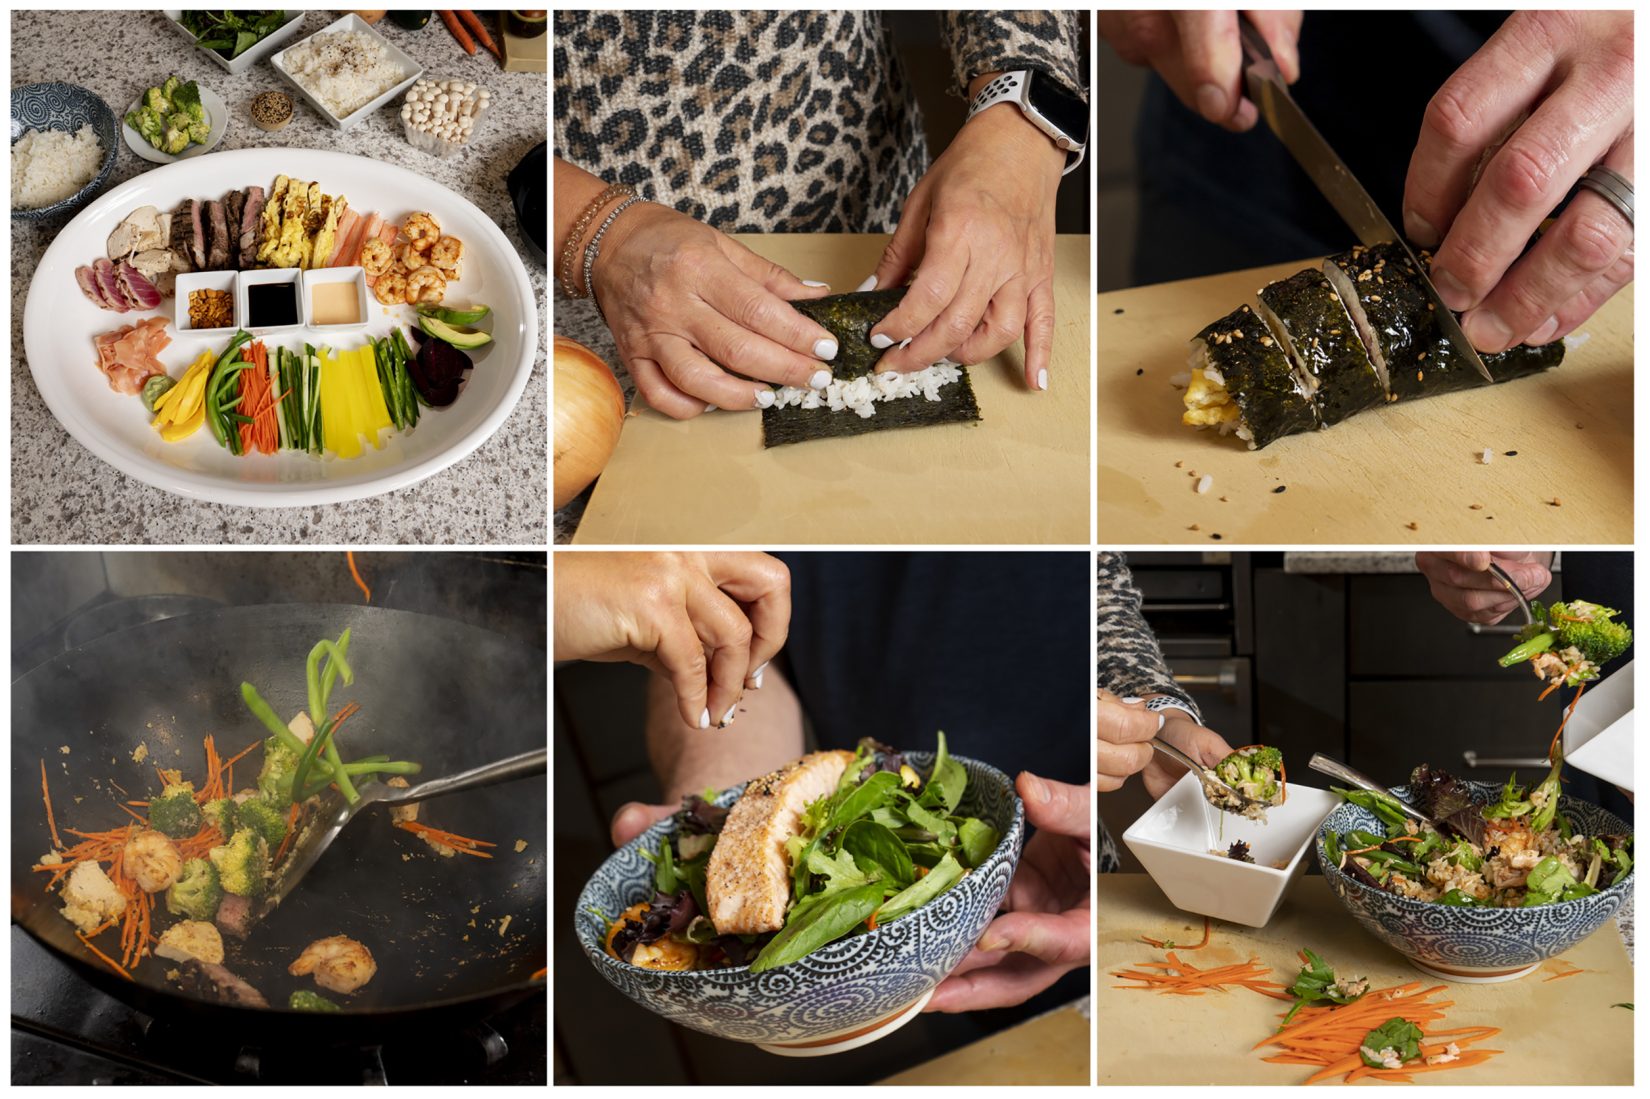
You can even make the experience interactive by having a variety of julienned vegetables, fruits and pickles, as well as some meats, fish and sauces. (Jina points out that this is a great way to use leftover meats and vegetables you might have at home.) You can have a finished bowl of rice and give a tutorial on how to make your own sushi.
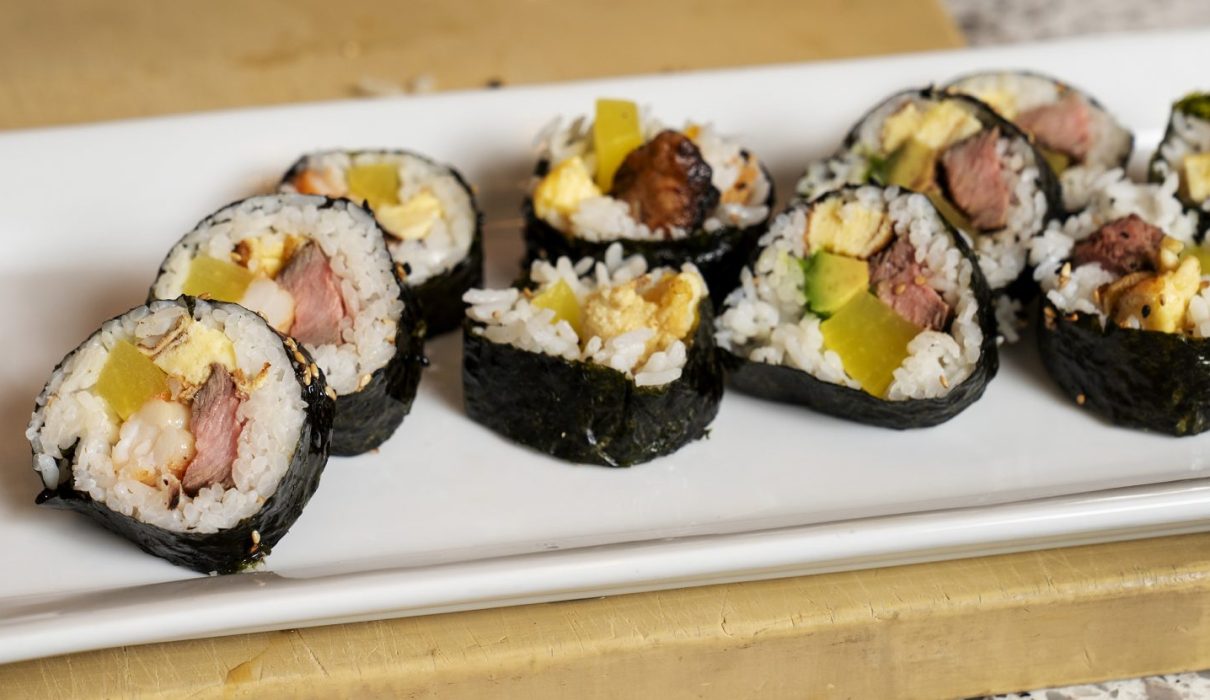
Jina brought a delicious platter with sliced steak, seared tuna, chicken, egg, crab, shrimp, avocado, peppers, pickled daikon, cucumber, carrots, wasabi and ginger. All were cut to roll easily into half sheets of nori seaweed paper.
Each person could dip their hands into the water with a little white vinegar, pat about 1⁄4 to 1⁄2 cup of cooked rice onto the nori sheet and choose their own ingredients to roll into the maki roll. Next, slice (half sheets of nori make five maki slices), drizzle with their desired sauce and enjoy.
BIBIMBAP
You might not be as familiar with the Korean rice bowl dish, bibimbap or bibimbop. The name is derived from the Korean term bipim, meaning to mix, and bap, meaning rice. The name refers to the way that, once presented with the bowl, eaters would mix the vegetables and protein into the rice before eating.
You can use the same type of platter of vegetables and meat that you have on hand for sushi and guests can assemble their own mixture, quickly cook in a wok or sauté pan, and place on top of their warm rice in a bowl. This allows guests and kids to pick the ingredients they prefer (or are comfortable with) for their meals. You can add a main protein to the top, such as a fried egg, roasted salmon or sliced steak.
Once presented with the bowl, eaters can top it with their desired sauce, mix and enjoy.
RICE
Throughout the whole time cooking with Jina, rice was the item about which I was most concerned. I am comfortable with rice pilaf and risotto, even steamed rice, but unsure of the sushi rice procedure.
Jina explained that you don’t need to overly complicate it. The best way to make rice that will work great for sushi, or bibimbap, is to purchase a bag of short grain sushi rice from an Asian market (we have several great ones in Columbia). Soak the amount of rice specified on the cooker, covered by at least 2 inches of water for a minimum of 30 minutes, drain the water and follow the directions for the rice cooker.
To make it into sushi rice, you need to make sushi rice vinegar. This mixture is called shari-zu and is made up of vinegar, sugar and salt. Jina uses white vinegar, but some people prefer rice vinegar. The total is about 1⁄2 cup of the vinegar mixture folded into about 3 cups of cooked rice, but more or less could be added depending on the preferred taste.
To make the shari-zu, warm 1⁄2 cup vinegar in a saucepan, turn off the heat then whisk in five tablespoons granulated sugar and 1⁄2 teaspoon salt until dissolved. Pour the mixture from the saucepan into another container. Once your rice is cooked, transfer it to a bowl (preferably a wooden one) and slowly fold the mixture into the rice. Be careful not to mix or damage the grains of rice. You can taste the rice and adjust with more shari-zu as needed; any extra of the vinegar and sugar mixture will store well in the refrigerator.
This will probably be WAY more than you need. Reserve what you are going to use. Then take the excess rice and, while the rice is warm, place it into an airtight deli or Tupperware container and put it directly into the freezer. This will help ensure that the rice does not dry out.
When you are ready to use it, remove it from the freezer and place it on the counter to thaw for three to four hours. When ready to use, place it into the microwave to warm it for a minute or two.
You will be ready to use for bibimbap or you can allow the rice to cool for a little bit, then use vinegar water (about 2 to 3 tablespoons per cup of cold water) to dip your hands in when you are shaping the rice for sushi. This helps to prevent the rice from sticking to your hands as well as impart a faint vinegar acidity to the rice.
