
Most people get a little nervous the first time they carve the turkey. It’s just food. You may mess up a little during the first couple of times, but it will get easier. I think carving a raw bird is easier. There is no pressure of a dining room full of guests waiting to eat, and you can carve or fabricate it at your own pace. Cutting or fabricating the bird into usable parts sets your less-hectic holiday into motion. By making the cuts now, you won’t have to make them later.
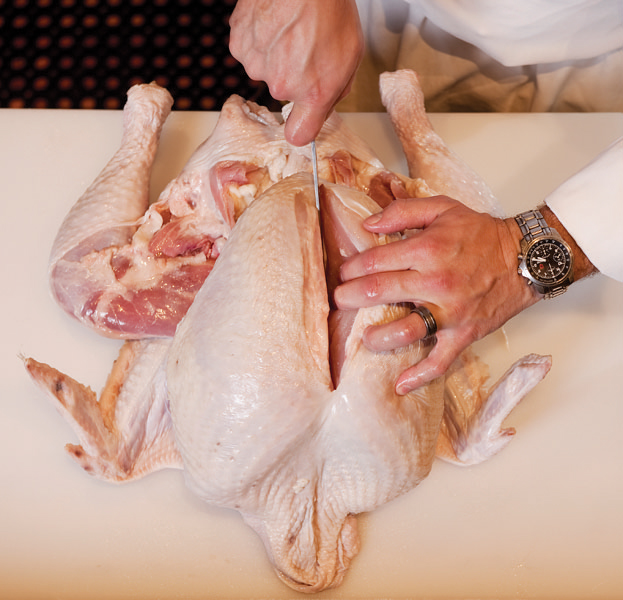
1) Start with an 18 to 20-pound turkey. Cut an upside-down “V” about one-fourth inch deep outlining both sides of the wishbone just above the neck. This will allow a better yield when removing the breasts.
2) Next make a cut just through the skin between the breast and the legs as close to the leg as possible.
3) Hyperextend the leg until the bone from the thigh pops out of the socket. Don’t remove the legs at this point because in this position they help support the bird during the carving process.
4) Cut down one side of the breast along the breast or keel bone. Follow the ribcage all the way to the wing and remove the breast. Repeat on the other side.
5) Cut off the wings from the back just between where it meets the carcass.
6) Separate the wing by placing the wing into a “V” shape on the cutting board and cut through the cartilage.
7) Lay the wing down and cut through the cartilage to remove the tip.
8) To remove the leg and thigh, cut from the tail toward the head, and cut into the “U” where the bone connects. Repeat on the other side.
9) Lay each leg, skin side down, on the cutting board and cut though the cartilage at about a 45-degree angle just along the fat line. Cut the remaining carcass into smaller pieces and it is ready for stock.
