
Cooking has always been a major event in my family, especially during the holidays. When I went to New York for culinary school, I was able to come back for only a short time over the holidays, so this left very little time to plan and execute our menu. We would start a slew of e-mails back and forth to each other just after Halloween about the turkey – not for Thanksgiving, but for Christmas.
Every year was a quest to find a new way to season and cook the turkey. In the late 1990s we got on a brine kick and we’ve never looked back. Most people ask, “What is brine?” You may have baked, roasted, smoked or even deep-fried a turkey, but until you have brined a turkey, you have not tasted the juiciest and most flavorful turkey of your life.
The basics of brining are simple. Also known as a “wet cure,” is a process where meat is soaked in a salt water solution that swells the protein molecules, thus allowing the meat to better retain moisture. The flavor of the brine penetrates faster and more effectively, and brined meat is actually more forgiving if slightly overcooked.
If it sounds simple enough, that’s because it is. You just need to follow the basic brine ratio and the appropriate soaking times. The rest is up to you. Have fun and be creative!
Basic Brine Ratio
1) 1 gallon of water/liquid
Instead of water, or as part of your liquid, you may use apple cider, 7UP, beer or wine. What liquid you use depends on what flavor you want to incorporate. If your liquid contains sodium you may have to lessen your salt amount in the basic ratio.
You could start with less liquid and finish with ice until your volume reaches 1 gallon. This procedure reduces the amount of time needed to chill the brine prior to adding the meat or poultry.
2) 1 cup of salt (kosher)
This is your sodium for the brine. You will need about 9 ounces of sodium by weight; you can replace the salt with sea salt, soy sauce, Worcestershire sauce, or another high-sodium flavoring. This may seem like a lot of sodium, but it is necessary for the proper solution. Keep in mind that only a small percentage actually permeates into the meat.
3) 1/2 cup of sugar
You may use granulated sugar, maple syrup, brown sugar, molasses, turbinado sugar (also called raw sugar), honey or any another highly sweetened item.
Aromatics as desired
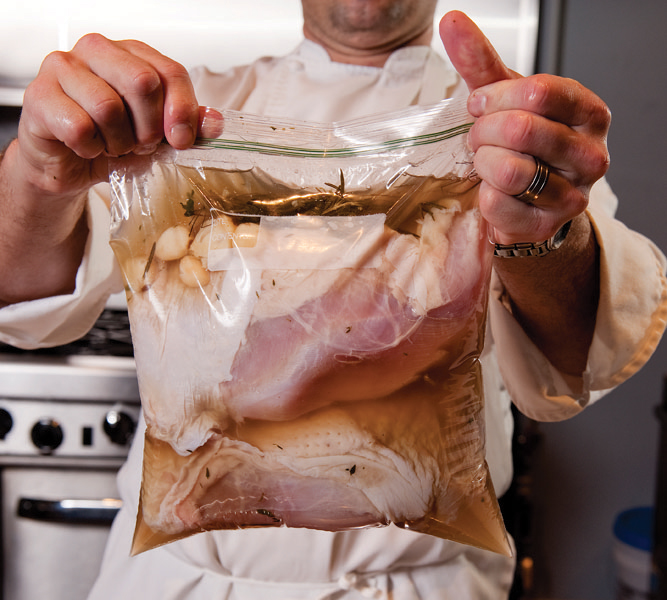
This is where you add the special flavor to the dish; the whole point is to extract the flavors of the aromatics into the liquid so the salt can disperse the flavors into the item being brined. The amount will vary, depending on how assertive or subtle you want the flavor to be. By partially crushing the spice or lightly shredding herbs you allow the flavorful essential oils to be released into the liquid more easily. You may use such items as peppercorns, cloves of garlic, herbs, lemons, limes, other spices, herbs or fruits. Just about anything you can think of can be used to impart flavor.
Procedure
I normally start off with about half the amount of water or liquid, then add all of the other ingredients. After bringing it to a boil, add enough ice to bring it up to the correct ratio (1 gallon if doing the recipe one time). You want to make sure that your brine has cooled below 41 degrees Fahrenheit before adding the item. From this point on, the brined item must remain chilled. If you have space, keep the container in the refrigerator for the soaking time — a rare occurrence around the holidays. Another tip is to keep it in a large container inside a cooler; just remember to keep replenishing the ice. We have been known to keep it outside, barricaded from the pets, as long as the temperature is going to be between 27 degrees and 40 degrees.
You may use any clean/sanitized container that will be large enough to hold the brine and the completely submerged item. Less brine is needed if you use a container that is taller than it is wide. A large food-grade container is the best idea. An old five-gallon detergent bucket is a bad idea.
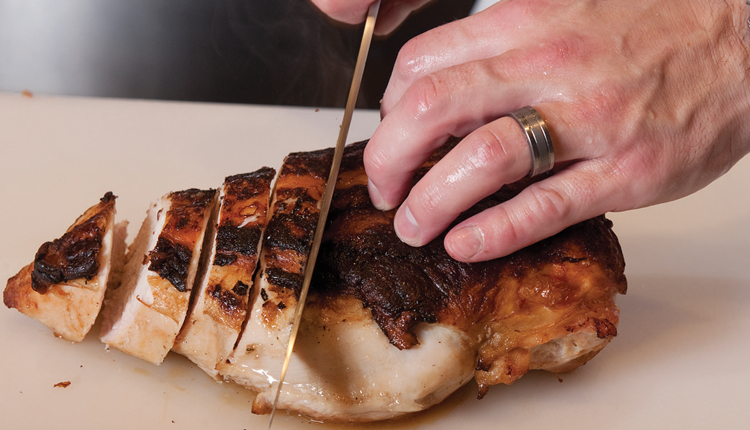
After brining the item for the appropriate time, remove it from the brine, dry the skin and lightly season it. At this point, it is a good idea to let your item rest. This resting time allows for a more evenly seasoned item and it allows the skin to dry more thoroughly, resulting in a crisper skin. Larger items will benefit greatly with a few hours of resting time. Now you may cook it as you wish; I prefer to roast the turkey at 350 degrees until the internal temperature reaches 165 degrees. If your turkey has a pop-out thermometer, the first step is to pull it out and throw it away. The pop-up is the easiest way to accidentally overcook your turkey and dry it out. Instead, check it with an instant-read thermometer in numerous places on the bird to ensure that it is fully cooked.
WARNING: Do not deep-fry a brined turkey; the moisture will cause the oil to overflow and explode.
Soaking Times
The maximum soaking time will depend on the size of the item you wish to brine.
This chart offers some suggested times. Comparable items (such as a duck, which is about the size of a 3- r 4-pound chicken) will require the same soaking time.
Meat/Weight Chart
Fish/small meat items (4–6 ounces): 30–60 minutes
Boneless chicken breasts, pork chops (6–10 ounces): 2 hours
Whole chicken/bird (2 pounds): 4–6 hours
Whole chicken/bird (3–4 pounds): 8–12 hours
Pork loin (4 pounds): 12 hours
Roast/large meat item: 2–3 hours per pound
Whole turkey (10–15 pounds): 18–24 hours
Whole turkey (more than 15 pounds): 24–36 hours
Note: If you accidentally soak your item too long or add too much salt, you may resoak the item for half the original time in unsalted water and the salt will balance out.
Basic Brining Recipe
Approximately 8 cups ice — reserve until after boil (may need more ice to reach
total of 1 gallon of liquid)
1 cup of kosher salt
½ cup sugar
2 tablespoons cracked peppercorns
6 cloves garlic, smashed
3 bay leaves, crushed
Bring all ingredients (except ice) to a boil, transfer solution to a container large enough to hold brine and item. Add ice and stir until dissolved. Cool brine to 41 degrees, add item and soak for appropriate time (according to meat/weight chart). Remove from brine, dry, lightly season with salt and pepper and cook as desired (no deep-frying).
Apple Cider Brine
2 cups 7UP
2 cups water
Approximately 8 cups ice — reserve until after boil (may need more ice to reach
total of 1 gallon of liquid)
1 cup of kosher salt
½ cup maple syrup
2 tablespoons crushed peppercorns
3 cloves garlic, smashed
2 sticks cinnamon
1 tablespoon fresh, sliced ginger
Bring all ingredients (except ice) to a boil, transfer solution to a container large enough to hold brine and item. Add ice and stir until dissolved. Cool brine to 41degrees, add item and soak for appropriate time (according to meat/weight chart). Remove from brine, dry, lightly season with salt and pepper and cook as desired (no deep-frying).
Brook Harlan is a graduate of the Culinary Institute of America in Hyde Park, N.Y. He is a culinary arts instructor through the Columbia Area Career Center and head wrestling coach for Rock Bridge High School.
