
You may think that having a compost pile is a lot of work, but with the proper balance of ingredients and a little bit of patience, your garden soil can be replenished with finished compost. My goal is to help you reach Garden Zen — a oneness with your compost pile that will keep your garden happy and productive for years to come!
Your Compost Set-Up
The basis for any compost pile is its location and construction. Ideally you do not want your compost pile near trees or shrubs because of potentially invasive roots. If you have a root-free space, you can simply start dumping your compost material on the grass or dirt. For roots, a tarp or impenetrable layer can be placed as the base of the pile.
If you need to enclose your pile, you can use posts or stakes with turkey wire (heavier gauge than chicken wire). You can also use straw bales though fencing will allow better air flow. The size you should aim for is roughly 3 cubic feet, though you can get somewhat deeper. Just keep in mind that the deeper the pile gets, the slower the process will be.
I have a three-bin compost set-up. Bin One is for dumping garden scraps, leaves, some grass clippings and branches with leaves, which are then left to rot. Bin Two contains the working pile, where we will be adding in the ingredients. Finally the finishing pile is in Bin Three. The finishing pile basically sits and ages until ready to harvest the “black gold” humus soil that is the end goal of all compost piles.
The Road to Black Gold
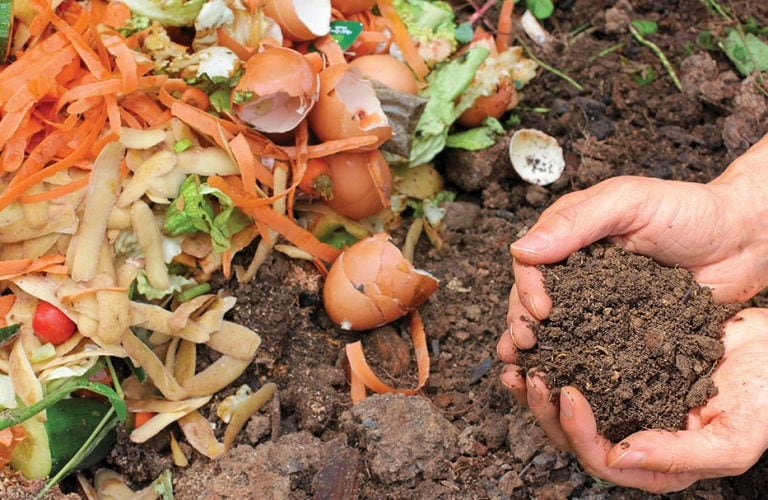
The road to this black gold is simpler than you think. It comes from a semi-precise mixture of ‘browns’ and ‘greens.’ Browns refer to carbon-rich material, while greens are nitrogen-rich material. The brown material doesn’t have to be shredded, though shredded material is easier for digestion by the “microherd” (insects, larvae, fungi and bacteria).
If you have ever kicked over fallen leaves in the forest, the “dirt” under the leaves is actually finished compost, produced in a truly Zen manner by the microherd in nature. After leaves, the next ingredient should be a few scoops of garden dirt, the best you can find around your own garden. The garden dirt will contain the starter microherd your pile needs.
Now that you have your basic ‘brown,’ a very obvious and easy ‘green’ for you to add is your own shredded lawn grass. All ingredients should be as chemical-free as possible, since the microherd are the targeted “pests” of many lawn products. Another reason to use grass without chemicals is that the nitrogen and other elements in the chemical fertilizer will convince your microherd they don’t need to work so hard to derive those same elements from your compost ingredients. At this point, you are set to go with dirt and greens, which are a mix of slightly less grass than leaves.
The goal here is to slow cook the compost, which is much less work than “hot” cooking compost. Parts of the pile will get ‘hot,’ but it usually takes 6 months for all the rot to become pure compost. The only thing you should do at this point is to mix all the ingredients with a pitchfork. Rather than keep the ingredients layered, you put all ingredients in direct contact with one other, thereby making it easier for the microherd to digest the ingredients.

Add in Kitchen Scraps and a “Kicker”
The main source of additional ingredients is the kitchen. You can put everything in any small bucket with a tight lid. The essential ingredients to collect are coffee grounds and tea bags. You can throw the occasional meat-related product in the compost but it should be buried deeply in the pile where it won’t attract meat-seeking mammals. Once the kitchen container is full, take that directly to the compost pile. If you keep a series of 5-gallon buckets with tight-fitting lids you can put off the work of digging into the compost pile for a bit. Basically, the more buckets you have, the more Zen your compost process will be.
After the 5-gallon buckets have taken all they can hold, it’s time to mix them into the main compost pile. You can also now mix in your additive of choice, everything from dehydrated molasses to rabbit pellets (either their manure or the actual alfalfa pellets). Basically, we are looking for anything with a little more ‘kick’ than the typical green or brown.
The molasses is ideal because of its high sugar content, perfect for nitrogen-producing microherds. But alfalfa or pine pellets (found in some natural cat litter) are also good because of their protein content and help with odors. Manure is another common additive, but again, you have to watch the source, since unwanted pesticides, hormones and weed seeds are found in most common manures. You also want to avoid manures from any meat-eating animal, since those manures may harbor pathogens.
Mix the Mix
When adding in the contents of the 5-gallon buckets, dig a hole in your compost, pour in the contents, sprinkle on any additive and then stir everything together with your tool of choice. Rake in a bit of the surrounding compost from the pile and then bury deeply. Make sure the hole is a foot or two deep so that you are completely burying the contents of the 5-gallon buckets deep. This will keep smell and invasive rodents to a minimum.
Once the buckets have been emptied and rinsed out, with the rinse water poured back into the compost pile, you can relax. That compost will cook itself with very little effort over the next 2 to 3 months; though remember we are talking about the ‘working’ pile, so this will get turned over completely as it becomes the next season’s finishing pile.
Once the old ‘finishing’ pile has lost about 50 percent of its volume, it can be used on the garden. A compost screen is handy at this stage, made from leftover fencing. It will help clear any trash, as well as sticks or other large matter. Sticks are good for the working pile since the space they create in the pile allows for the oxygen that is vital for a healthy microherd. Screening the compost will result in near potting soil consistency.
Completing the Circle of Compost
At this point, the process starts all over again once the working pile is emptied into the finishing pile. Overall this is the least Zen of all the weeks, since you do have to put in several hours of moving piles from compost to garden and from pile to pile. The ingredients from the ‘dump’ pile then become the base of the new working pile, completing the circle of compost.
